
Post may contain affiliate links. Click to read Disclosure . Click to read Privacy Policy.

Up until now we have tackled some pretty big blogging tasks to get this new blog going.
- decided to start a blog
- found our niche
- bought a domain
- chose the blogging platform
- set up your blog and made it all pretty 🙂
- signed up for and installed Google Analytics
Adding Copyright To Your Website Footer
Today we start digging in to all of the smaller, possibly more tedious things that aren’t necessarily things that our readers see or notice, but, nevertheless they are still important.
Often in blogging we have to place code to make things happen. Advertisements usually require code, changes we’d like to make in the look of things or how things behave often require code. One such thing is what we’ll do today: copyright footer code.
Now, there are times when we leave it up to a pro.. and there are times we can dig in and do it ourselves. It’s important to know the difference. When your blog is doing well financially you’ll want to pass some of it off – either because you’re too busy or because it makes your head spin to think about it! lol That’s why I have someone on retainer. I pay her monthly to do the harder more time intensive things – she can often do them faster and I just don’t have to think about it. SO, keep that in mind for a much later date.
Today we’re going to place code in the website footer area of the blog – as well as learn how to put a link in a post at the same time. You’ll need to add copyright info and keep it updated yearly. Such as this:

You’ll notice the copyright symbol and the year in the very beginning (this is another of my sites. I have been blogging for over 10 years at GroceryShopForFREE.com and a few others I own.) This is the wording my attorney drew up for me to add in the footer area of my sites.
When you add something to the header or website footer design areas it shows up (in some cases it’s invisible) on all pages, and posts on the site. So, one placement for all. Super easy, too.
Let’s get started:
To add this bit to the bottom of your site you’ll need to “code” it the way your site can read it to display it properly. Here’s what that looks like:
© 2017 <a href=”http://www.groceryshopforfree.com/”><strong>Dian Farmer</strong> All Rights Reserved. No content on this site may be copied and reused in any form or fashion without express written permission. </a><a href=”https://dianfarmer.com/privacy-policy/”>Privacy Policy</a>
Does that look scary? No need to worry about that – here’s how you do it easily.
Go to a new post in your dashboard and type in what you want it to say. Then highlight your site name and click on the link button in the top of your post:
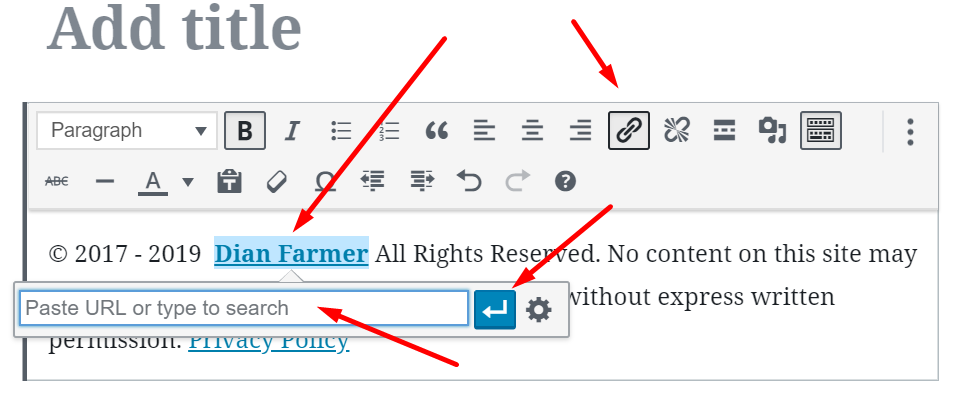
@2017 Your Site (replace with your site name) All Rights Reserved. No content on this site may be copied and reused in any form or fashion without express written permission.
Pop in your new blog’s web address (or URL – same thing) and click on the “Enter Arrow” and it will apply your changes:
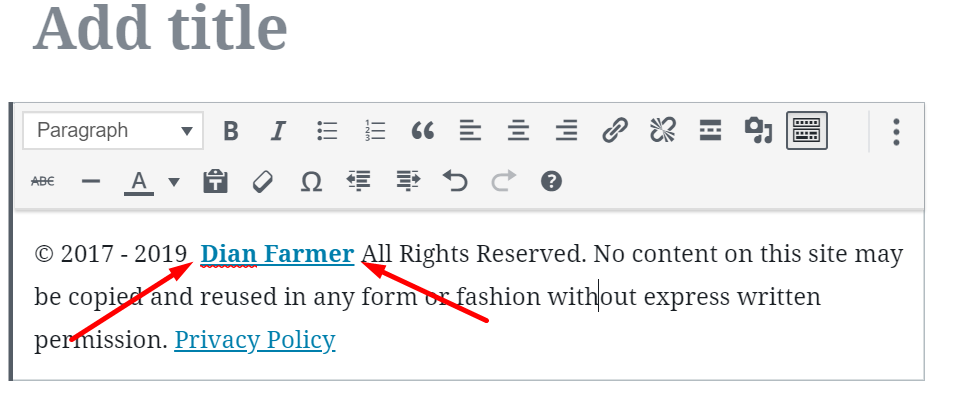 Now when you click on that it will open the homepage of your new blog.
Once you have it looking the way you want it to look in your footer, you’ll just go up to the top right of your editor and click on the three dots on the top right:
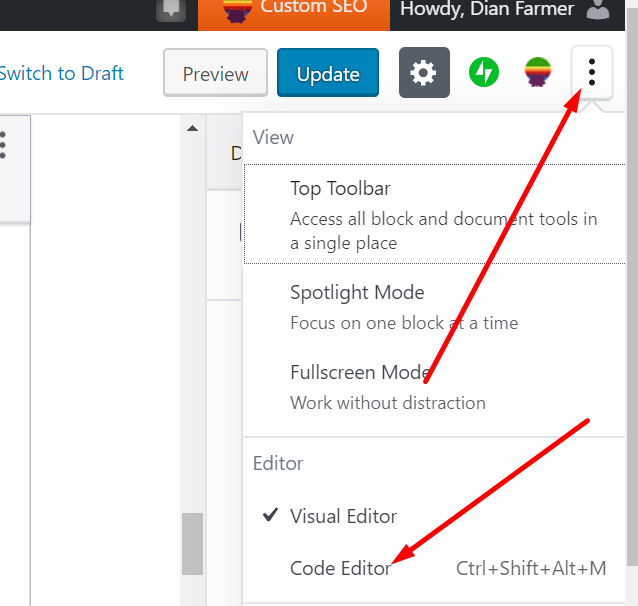
Once you click over to the code editor, you’ll see the code you need for your footer. Copy the entire thing, don’t miss any of it, or it could wreak a bit of havoc.
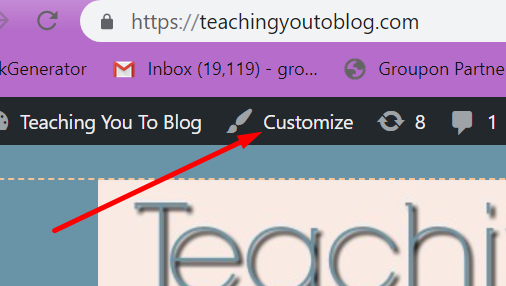
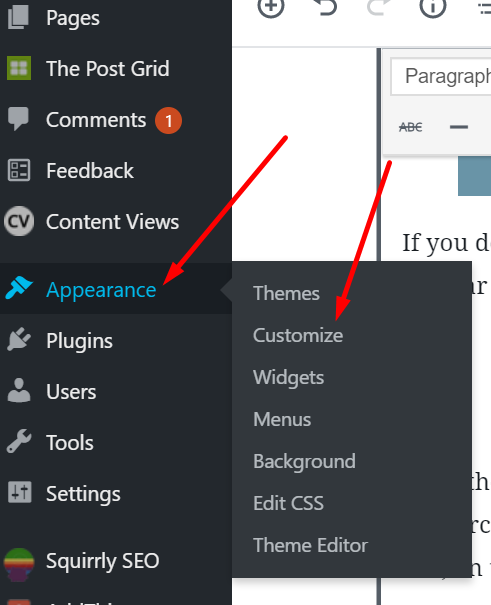
 Now, we’re going to place the code. Go to your homepage and click on Customize in the black bar at the top of the page. Only you can see this bar when you are logged into your site. Your readers don’t see it. Remember you have to be logged in to your site to see it.:
If you don’t see it there, don’t worry you can also get to it from the left sidebar of your dashboard, here:
Once the customizer opens up in the left side of your screen you may have to search a bit to find the footer area. It’s in a different spot for my sites. But, on this site it’s in the widgets:
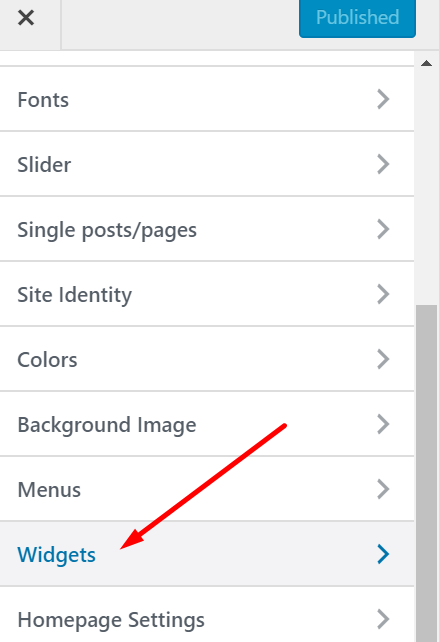
On mine I can choose a footer, some sites have sections in their footer:
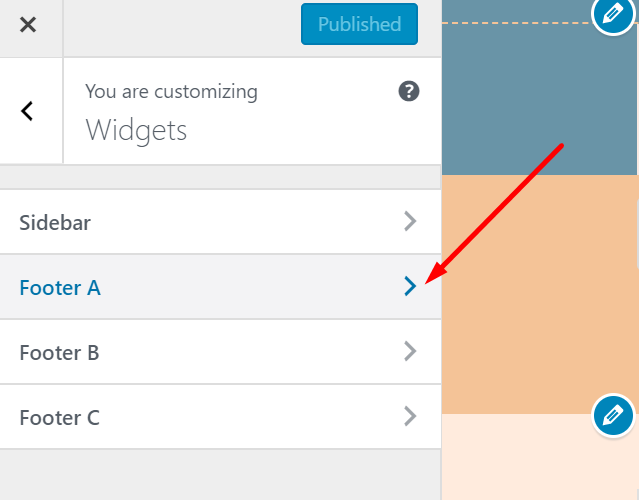
Then you see Add A Widget, then you’ll be given a list of widgets you can add, you’re looking for a “Text” widget.
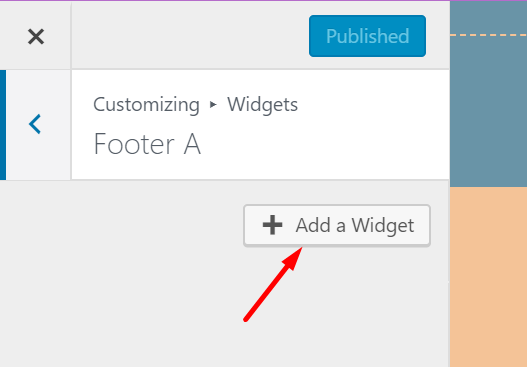
Choose that one and then pop your code in the Content area and leave the title blank:
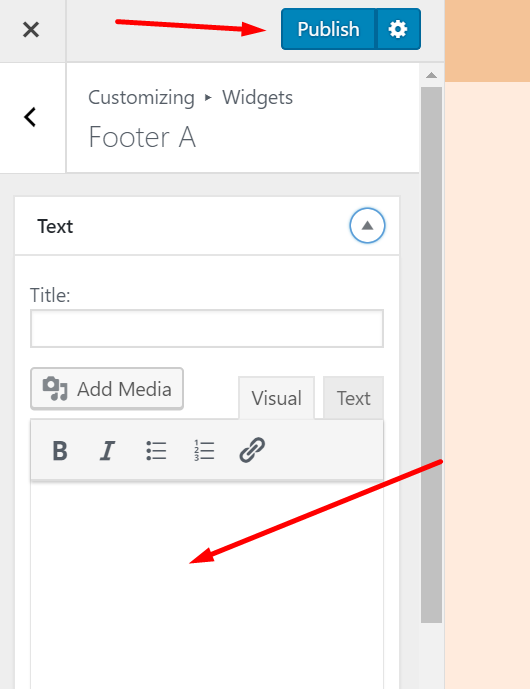
Click done at the bottom and publish at the top and you’re done! Close out of the customizer and refresh your homepage and see your handiwork in the footer copyright!
Be sure to read all of the posts in this How To Start Your Own Blog series. Don’t miss any of them or you could be setting yourself up for failure. Each one is as important as the next. Remember, you’re skipping all of the mistakes I have made over the years.

Hi, I am using the Bloggerz theme on WordPress and I was trying to figure out how to do this on my theme but I cannot find an option for “Footer” in my widgets or anywhere else. I did however find that there is one that I’m assuming was created by either WordPress or is just automatically part of the Bloggerz theme. It doesn’t say anything that yours says except All Rights Reserved and the year and my site name.
Is there a way, that you might know of, to get this changed over without changing my theme. I’m not quite ready for that just yet as I’m trying to figure out other things first.
Amber,
You can download a plugin called Insert Headers and Footers and that will give you a box for both areas you can pop it in to.
I hope that helps! Let me know if you have any more questions!
Dian
Amber,
Also once you install the plugin and activate it, you’ll find it in Settings on your left sidebar in the dashboard:
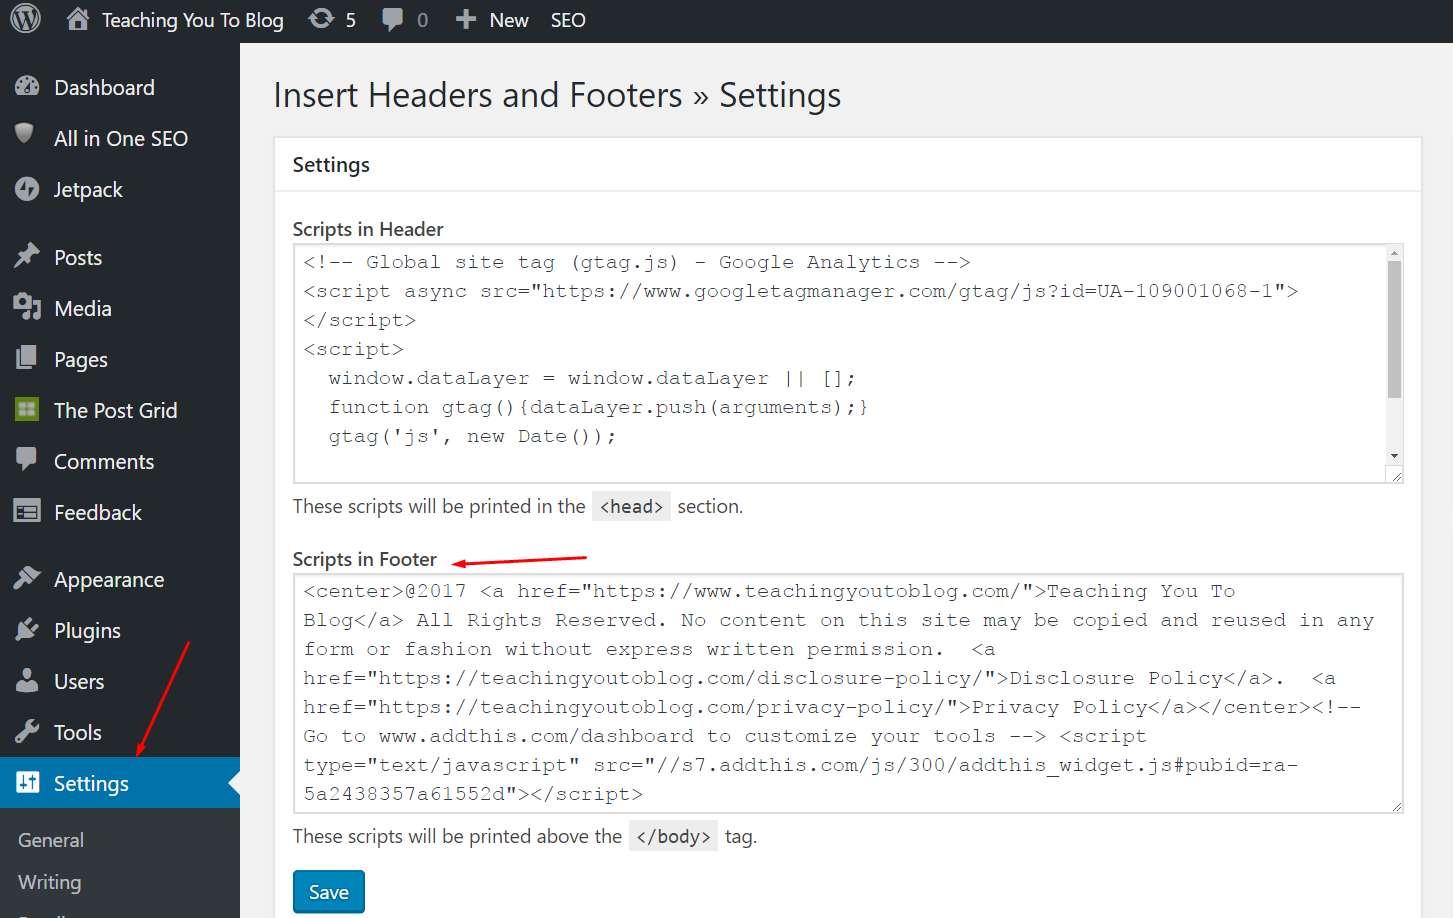
Dian