
Post may contain affiliate links. Click to read Disclosure . Click to read Privacy Policy.

We have decided to start a blog, we found our niche, we bought a domain, we chose the blogging platform, we set up your blog and made it all pretty :).
How To Install Google Analytics On Your New Blog
Now, we need to start getting down to the everyday running of the blog. One of the first things we need is to know if people are coming to our blog, and what posts they are coming to so we know what they like and then we can do more of that!
The best tool for this and what I personally use and recommend is Google Analytics. There are many plugins you can use to learn about your page views and so forth, but, by far Google seems to have the best and most thorough information about your site’s analytics.
Let’s get started. First you’ll need a Google account, if you have a Gmail account or a G+ account then you already have a Google account, you just need to tell Google you have a new website.
Sign up
If you already have a Google account just sign in. If you don’t have a Google account, sign up for one.
Now that you’ve signed in or signed up, we’re ready to add your new blog.
Here’s what you’ll see:

Click Sing Up on the right and on the next screen choose Website:
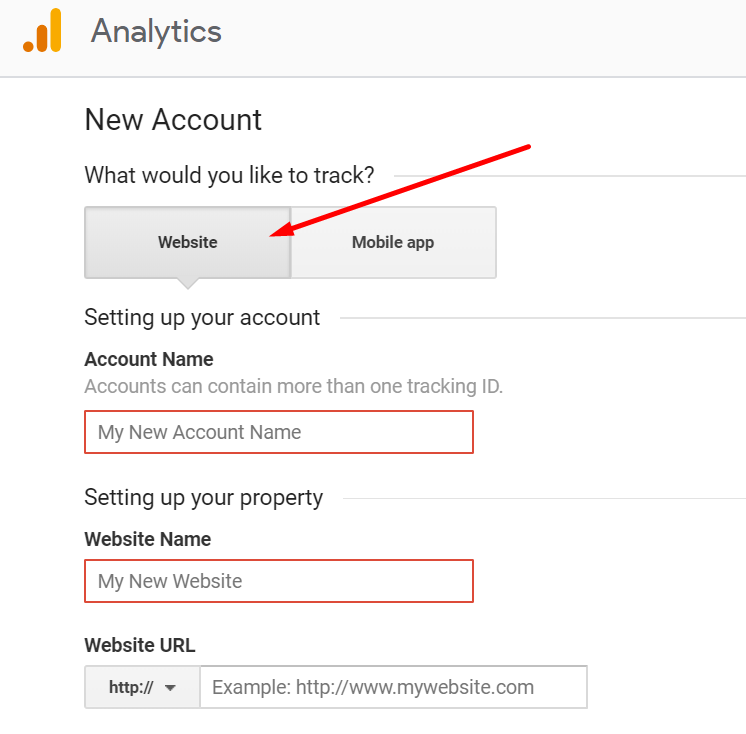
Fill Out Your Blog Info
Your Account Name:
This can be anything you want – you can use your blog name if you like.
Website Name:
Here’s where you put your blog’s name.
Website URL:
This is where you put your website’s address, such as: https://DianFarmer.com – That is the URL of another of my websites. Be sure to enter the right url. If it’s https or http, and if it’s www or no www. Once you add your url copy and paste it in a browser and make sure it works right – you might have a typo and you want to be sure to enter the correct address here.
Industry Category:
Choose the one that most closely matches what you decided your blog niche would be.
Reporting Time Zone:
Just change this to your time zone so you know when the people are coming to your site in your own time zone.
Data Sharing Settings:
I would just leave them all checked, you can opt out of any later if you find you don’t want or need it.
Click: Get Tracking ID and a pop up box will appear with Google Analytics TOS (Terms Of Service).
You’ll need to read through it and then choose the appropriate button at the bottom if you choose to accept or choose not to accept their terms. Note: If you choose not to accept, then you won’t be able to use Google Analytics. You can use a plugin such as Jetpack for WordPress instead.
Once you choose to accept their terms you will be taken to a page with your brand new Tracking ID – you’ll need this a few times in the future, but, Google keeps it handy so no need to write it down.
Now we see underneath the tracking ID the HTML or Google Analytics code to track your site. We’ll need to add this to your website.
For our purposes I will show you how to add the code for your Google Analytics setup to your WordPress site.
Highlight the entire contents of the box and right click and copy it to your clipboard. We’re then going to paste this into the head area of your site. You can use a plugin to do this easily.
I use the AH Google Analytics Code plugin to make things simple.
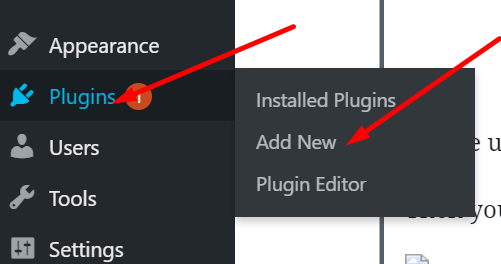
To use a plugin, go to plugins on the left side inside your WordPress dashboard, hover over it and you’ll see Add New, click that.
On the upper right there’s a search bar type in: AH Google Analytics Code
Then you’ll see this:
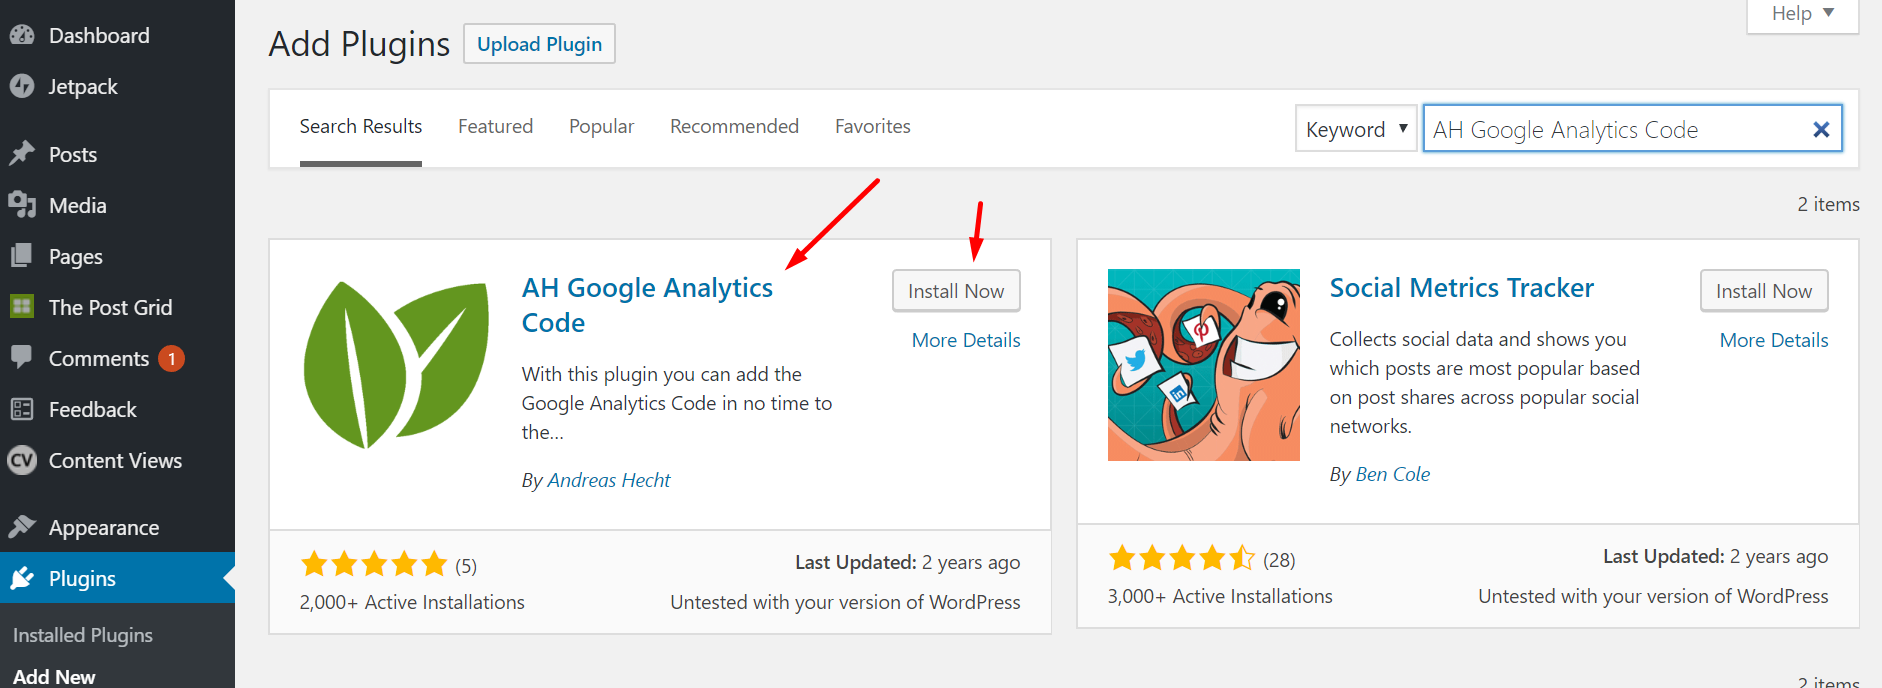
Press install and once it’s installed it will say Activate, click that and then it will be activated.
Insert The Code
Remember the code we copied a few minutes ago? If you don’t have it on your clipboard anymore just go back and copy it again.
Go back to your dashboard and on the left side under Settings you’ll now see your activated plugin that we just installed.
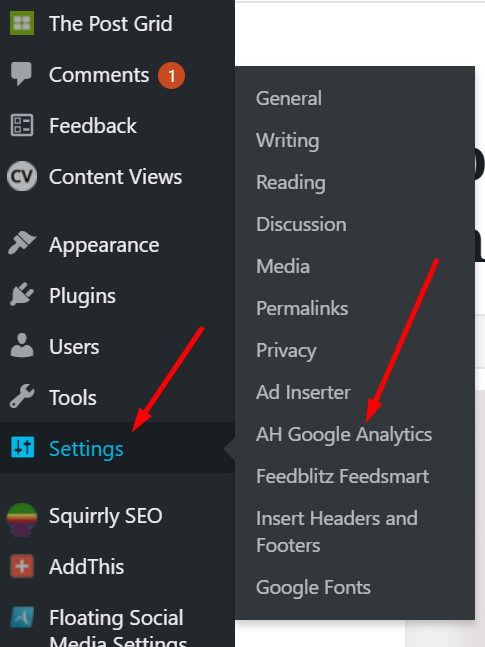
We’re going to click that and you’ll be taken here:
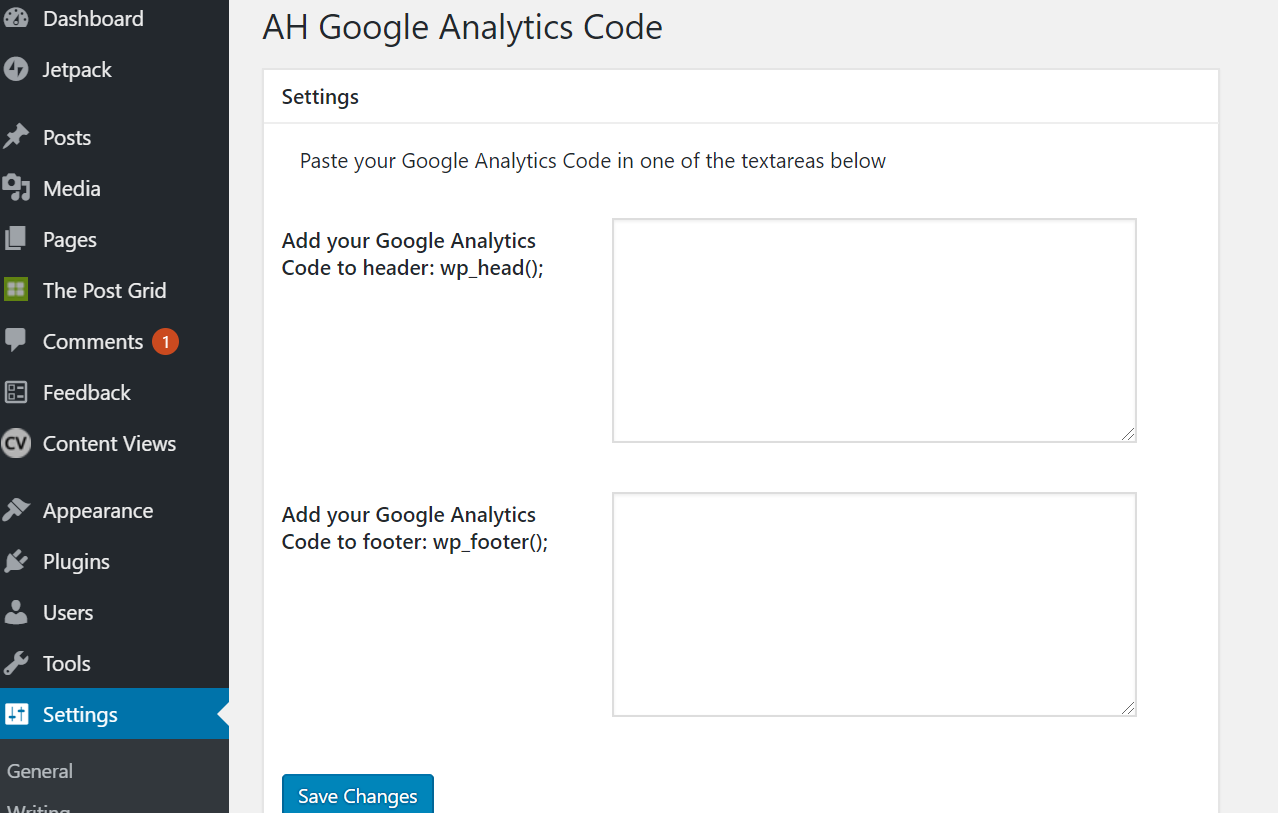
You want to paste your code in that top box where it will add it to your header. Then at the bottom of that area click Save Changes. Now, you can close that window. You’re all done!
Now as people start coming to your site, you can go over to Google Analytics and see all sorts of info about when and where they are coming from to your site, what they’re looking at on your site. It’s a lot. We’ll go into more detail in future post.
Be sure to read all of the posts in this How To Start Your Own Blog series. Don’t miss any of them or you could be setting yourself up for failure. Each one is as important as the next. Remember, you’re skipping all of the mistakes I have made over the years.