
Post may contain affiliate links. Click to read Disclosure . Click to read Privacy Policy.
You’ve decided you want to learn How To Start Your Own Blog. You’ve taken the time to read the post “How To Find A Profitable Niche For Your New Blog” and now it’s time to choose your name and buy the domain for your new blog.
A URL is the address people will type in to find your blog, and the domain is what you need to purchase at this point. Domains are your claim to that part of the internet where your blog will live.

How To Purchase A Domain Name!
This will walk you through what you need to know for your domain registration. There are many places you can purchase your domain from. What you’ll do is go to the domain registrar you choose to use (we’ll talk through them later in this post) and you’ll type in the name you have chosen for your new blog to make sure it is available, that no one already has registered that domain. If they have don’t worry there are many ways to make it work.
Say you were going to name your new blog MomLovesHerKids.com and you type it in at the domain registrar’s website and it says taken. At that point they will give you suggestions for what you might like to try. From there you can go many different ways:
MommyLovesHerKids.com
MommaLovesHerKids.com
MamaLovesHerKids.com
MomLovesHerBabies.com (with all forms of Mom)
MomAdoresHerKids.com
You can even choose to go .net, too.
and so on. Just think outside the box, you’ll find a name the fits and you’re happy with, too!
Now, one thing I will caution you about is there are people out there waiting to take advantage (no! Really? – lol). They can see when someone has searched for a particular name and didn’t buy it right away. They will then buy the name so that you have to pay MORE to get it from them. Just be sure when you start this part of the process that you are ready to buy when you start searching for the name you want. Don’t search one day and then come back another and hope it’s still available.
Also, be sure when you are thinking about the name for your new blog that it makes sense to the reader and to search engines like Google who will send people to you when they search. If you choose a blog name such as MomLovesHerKids.com and you’re writing about recipes that’s going to confuse the search engines and your readers. Just make sure it’s pretty evident to readers what they’ll find when they come to your new blog.
If the name is available for purchase from one company such as GoDaddy, it will be available from all other companies that sell domains. So, you can choose to buy your domain, if available, from any company that sells dominions. So, if you search on GoDaddy for the name and it is available, you will see it’s also available at 1&1 or NameCheap, and so on. The reverse is also true, if a domain is unavailable at 1&1, it will also be unavailable at GoDaddy, or Namecheap, and so on.
On to the How To Purchase A Domain Name part of this post!
Here are some of the choices of companies you have when you’re deciding who to use for your new domain:
GoDaddy
This is my choice – it’s just what I know and seems to be the prevailing choice among bloggers. So, we’ll start here.
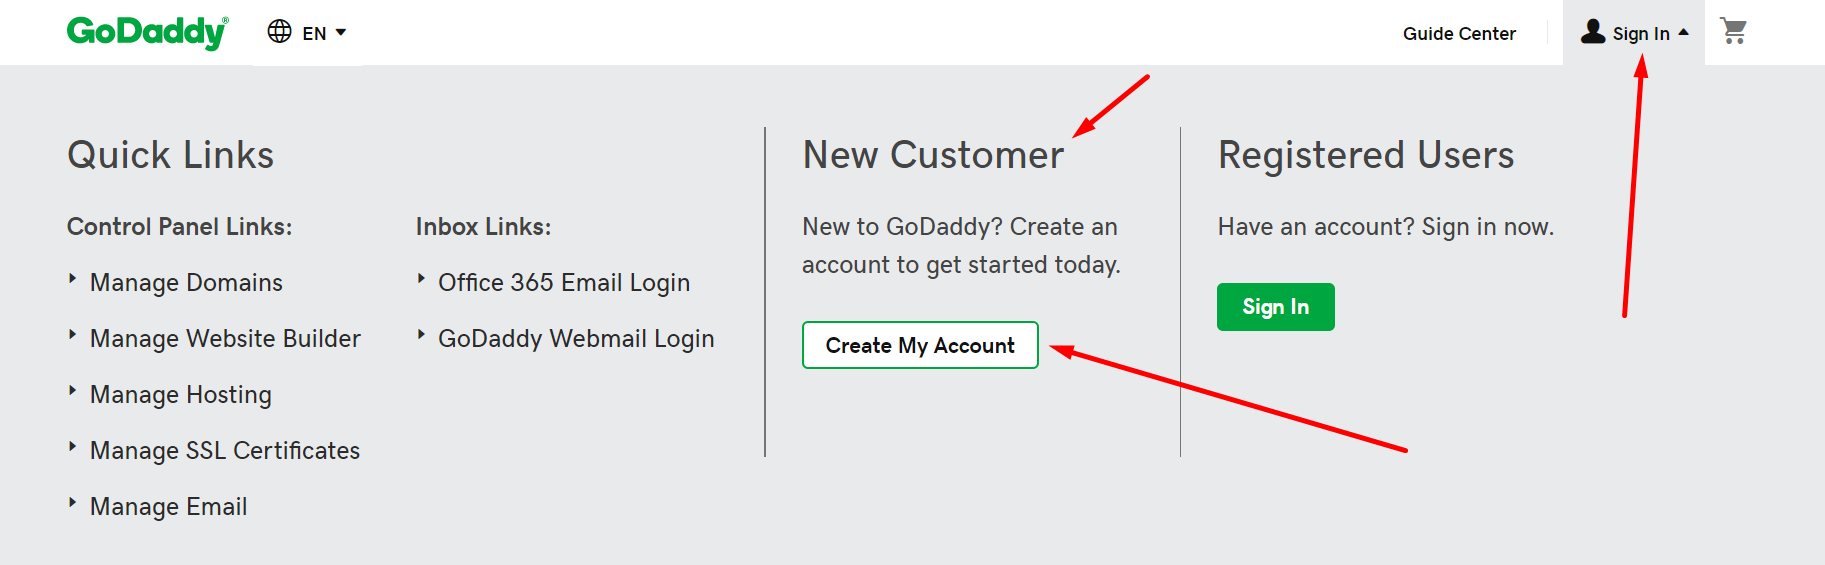
First go to GoDaddy.com and where it says sign in there’s a little drop down arrow. When you click that a large drop down will appear and that’s where you want to go to the New Customer section and choose Create My Account:
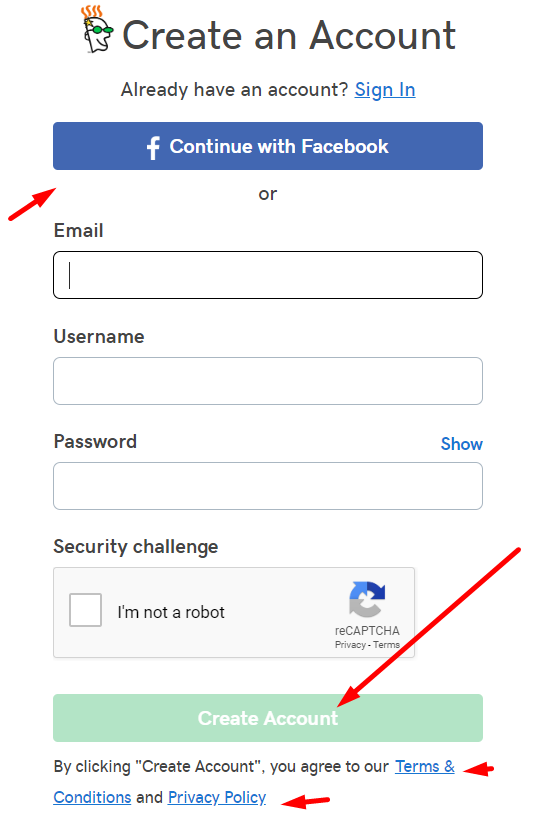
Then you’ll need to either use your Facebook account to sign up or choose a login. If you choose your Facebook account it will automatically log you in if you are logged into your Facebook account. When you choose to your email and username be sure to follow the rules for your password when you pick one.
Then you’ll choose a 4 digit PIN that you will use when you call in for support, so be sure to note this somewhere, you’ll need it whenever you call in to GoDaddy.
At the bottom of this pop up you can click the links to read the Terms of Service and their Privacy Policy before you click Create Account:
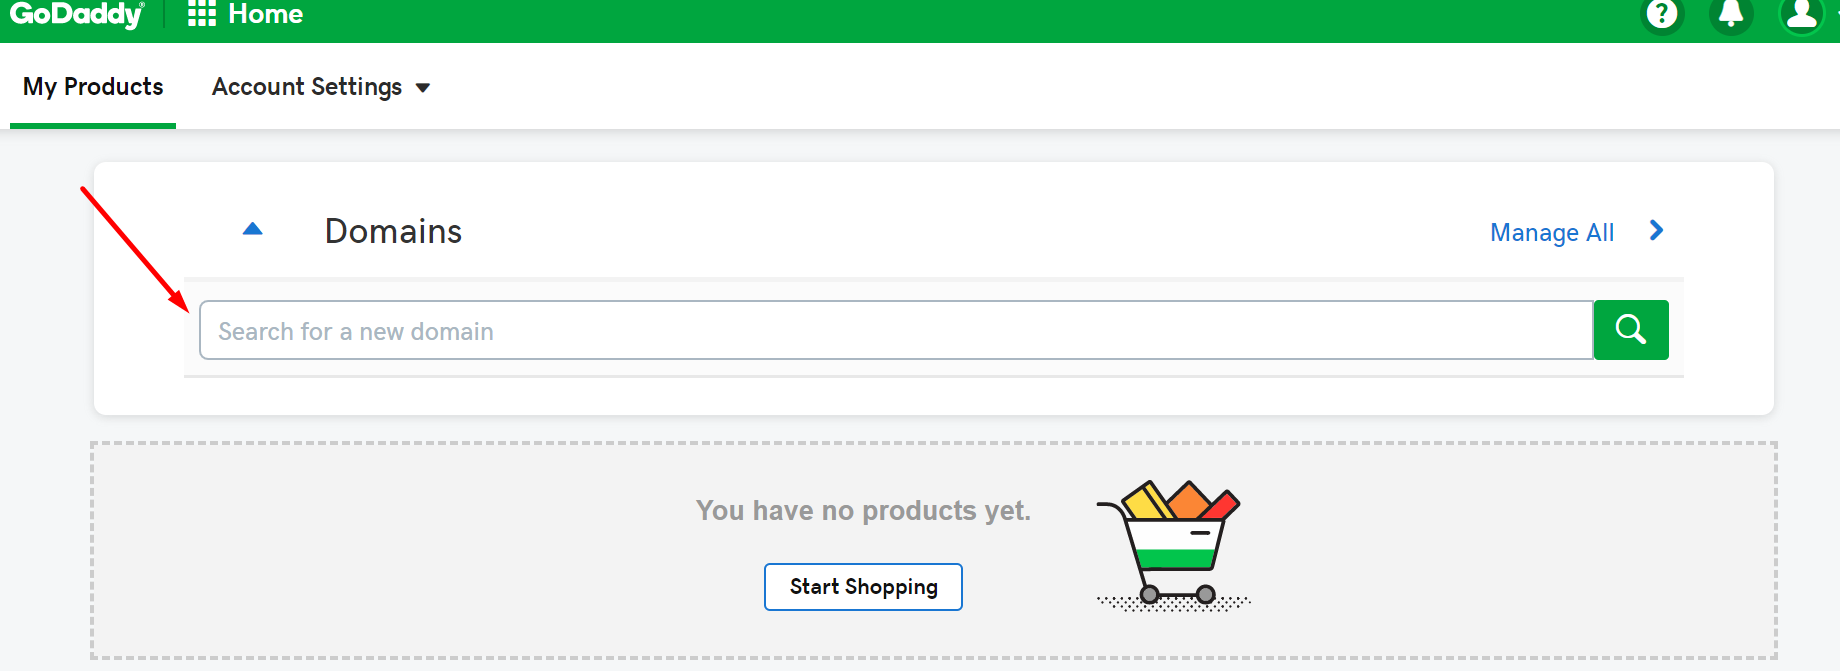
Now it’s time to check our name and see if it’s available. At the top of the page you’ll see Search Domain. Pop your name in there and choose search:
Now we see our name is available! Also we see all of the options to purchase our new domain, we can choose .com, .net. ,info and so on and all of the prices for them. It is possible when you search for your domain (anywhere) that the .com is available but maybe the .net is taken or vice versa or maybe the .info is gone. You’ll need to decide if that matters to you. Do you think you’ll ever want to come back and purchase another extension (that’s what they are called)?
Here’s what it looks like if our name is taken:
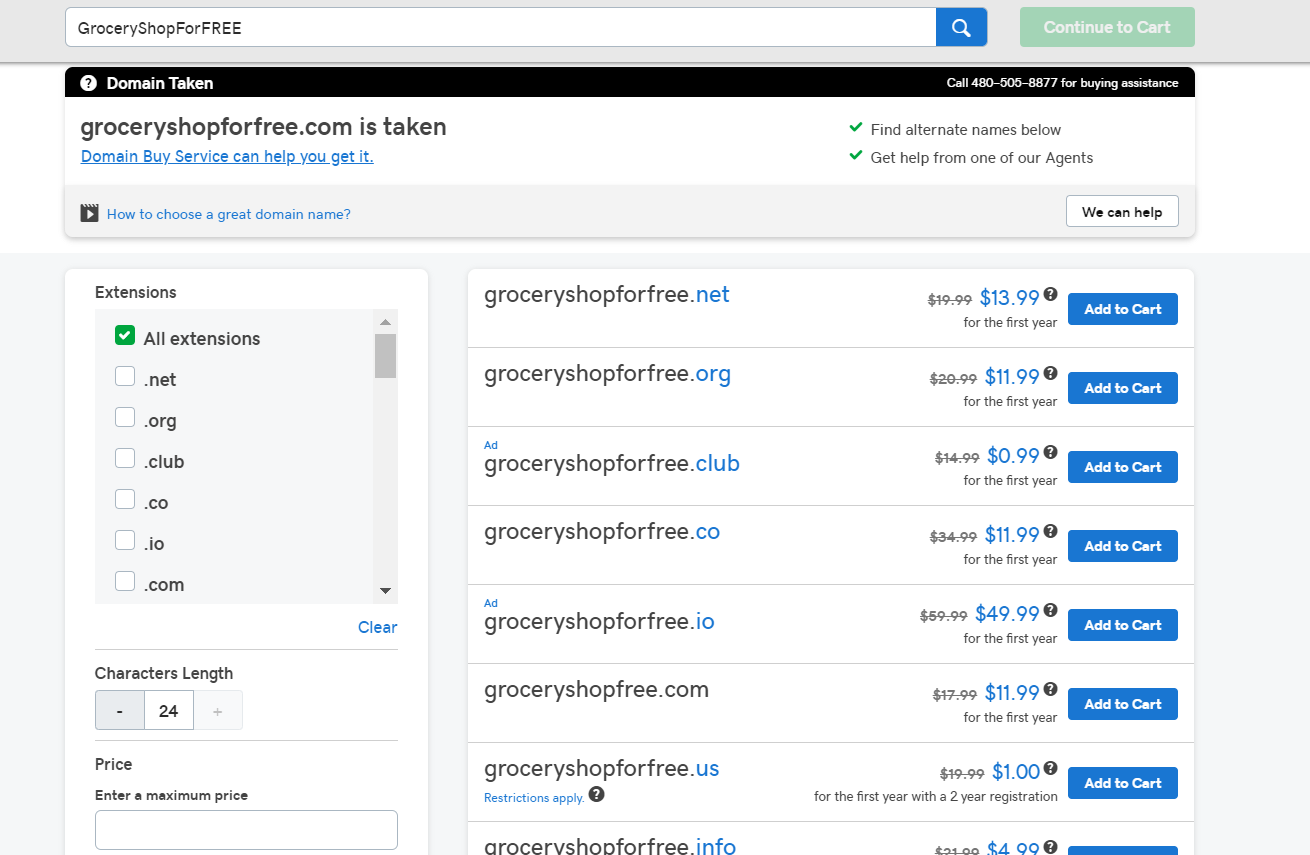
It tells us that domain is not available and it gives us suggestions from ones that are similar and are available for purchase. You’ll also see a link to see if you can buy it from the current owner. Maybe they aren’t using it anymore or never did and you might REALLY want that name. In that case, click that link and GoDaddy will contact the owner for you to see if they want to sell it. You will pay GoDaddy $69.99 plus a commission on the sale if that happens.
Right now for the purpose of this post we’ll just purchase the .com from the original one we searched that was available. We will purchase it for 2 years, because you’ll come to realize how important search engines are later, but, they don’t put much stock in what they see as an expiring domain, so anything less than 2 years is frowned upon by the search engines. They don’t think you’re serious if you have under 2 years invested i your site.
Looking at the image above you’ll see that this domain is on sale for $2.99 for the first year and then it reverts back to $14.99 for each year after that.
Now we click the large orange Continue To Cart in the top right corner of the screen.
At this point we need to decide if we want the privacy option or not. All domains that are registered (which is what we are doing now) automatically publish your name, email, address, and phone number for the public to find. However if you opt to purchase the privacy plan on this screen your personal info will be replaced with GoDaddy’s info, so no stalker, spammer, or spammers can track you down through your domain purchase. So, you’ll choose here to add that on or not.
Further down on this screen you can choose to get a free website. I wouldn’t suggest using it, but, it’s free for now.
You can also choose here whether you want to add an email address that goes with your new domain. For instance, [email protected]. If you choose to do this then you can choose the type you want from the drop down in that box. I have one, but mine was free for lifetime with my domain (remember it was about 10 years ago when I got this one). However, I also have a Gmail email account which if free, I have my domain email redirected to my Gmail and I use the Gmail interface primarily. It’s nice to have a domain email, it gives another layer of ownership. But, it’s not necessary. It’s just whether you’d like to do that or not.
Once we have decided on our choices on this screen we can press the Continue With These Options large orange button at the bottom right.
At this point we see everything we have chosen and the final cost, and it’s also GoDaddy’s last chance to try and get us to add on more services. You can always come back and purchase something else.
If you need help at this point on the bottom right side you’ll see a chat button you can choose to chat with a live agent. GoDaddy, in my opinion, has excellent Customer Service – and I don’t say that lightly. They know their stuff.
When you’re ready you can choose the Proceed With Checkout orange button on the right. At which point you’ll be asked your personal information and your billing information. There’s also a chat button on this screen, if you need help. Once you’re done click the orange Place Your Order Now button on the right and you will be the proud owner of your new GoDaddy domain!
Here are a few more you can choose from:
BlueHost
1&1
NameCheap
Be sure to read all of the posts in this How To Start Your Own Blog series. Don’t miss any of them or you could be setting yourself up for failure. Each one is as important as the next. Remember, you’re skipping all of the mistakes I have made over the years.
4 comments on “How To Purchase A Domain Name!”